Monthly Archives: May 2016

Arduino Light follower

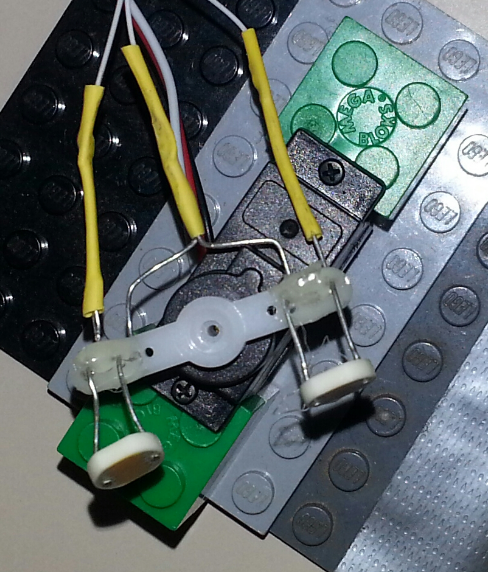
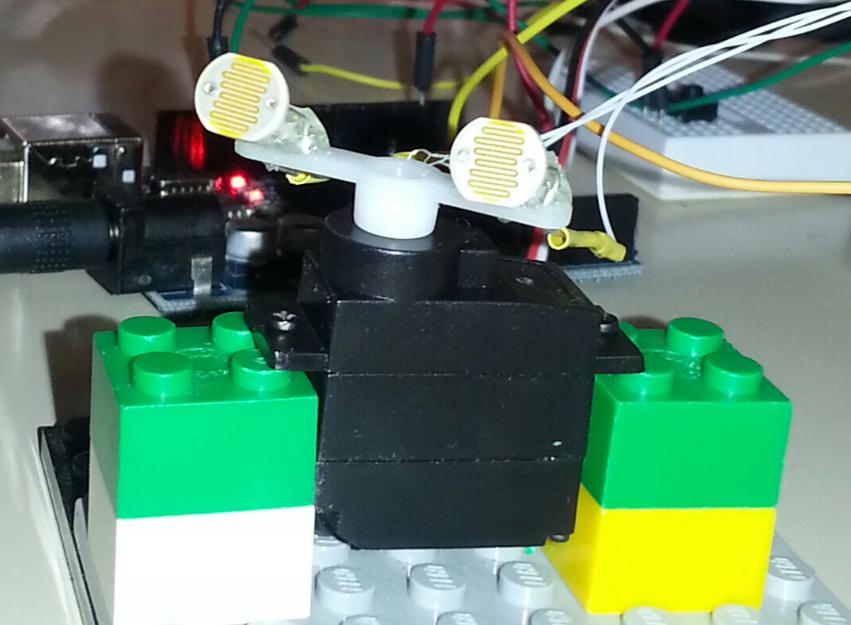
This is a simple light follower application using two CDS photocells.  I included a calibration feature to account for the difference between the photocells and the resistors.  Photocells are mounted as shown using hot glue.  The servo is the standard one that comes with the Sparkfun Arduino inventors kit.
 top view side view
/* Sweep
by BARRAGAN <http://barraganstudio.com>
This example code is in the public domain.modified 8 Nov 2013
by Scott Fitzgerald
http://www.arduino.cc/en/Tutorial/Sweep
This coded modified by Wimberleytech LLC and placed into the public domain 31 May 2016
*/
#include <Servo.h>Servo myservo;  // create servo object to control a servo
// twelve servo objects can be created on most boardsint pos = 90;    // variable to store the servo position
int sensorPin0 = A0;    // input from first photosensor
int sensorPin1 = A1;    // input from second photosensor
const int buttonPin = 2;     // the number of the pushbutton pin
int valPin0 = 0;  // variable to store the value coming from the sensor Pin0
int valPin1 = 0;  // variable to store the value coming from the sensor Pin1
int offset = 100;
int buttonState = 1;
int hysteresis = 5;

void setup() {
myservo.attach(9);  // attaches the servo on pin 9 to the servo object
pinMode(buttonPin, INPUT_PULLUP);
Serial.begin(9600);
}

void loop() {
Serial.println(“start loop”);
buttonState = digitalRead(buttonPin);
while(buttonState == LOW)
{
valPin0 = analogRead(sensorPin0);
valPin1 = analogRead(sensorPin1);
if(valPin1 > valPin0)
{
offset = valPin1 – valPin0;  // want to subtract offset from Pin1
}
else if(valPin1 < valPin0)
{
offset = valPin1 – valPin0;  // want to add offset to Pin1
}
Serial.print(“Calibrate: “);
Serial.print(offset);
Serial.println(“buttonState”);
buttonState = digitalRead(buttonPin);
delay(1000);
}

if (analogRead(sensorPin0) < analogRead(sensorPin1)-offset-hysteresis)
{
Serial.println(analogRead(sensorPin0));
Serial.println(analogRead(sensorPin1));
pos +=1;
myservo.write(pos);              // tell servo to go to position in variable ‘pos’
if(pos > 160)
{
pos = 160;
}
delay(50);
}
else if (analogRead(sensorPin0) > analogRead(sensorPin1)-offset+hysteresis)
{
pos-=1;;
myservo.write(pos);              // tell servo to go to position in variable ‘-pos’
if(pos < 10)
{
pos = 10;
}
delay(50);
}

}

BluetoothLE Temperature Sensor

This system measures temperature and sends the measurement to an Android phone via Bluetooth Low Energy (BTLE).  The microcontroller is a Silicon Labs C8051F931, the Bluetooth breakout board is a Nordic nrf8001, and the temperature sensor breakout board is a TI TMP102.

The micro talks to the nrf8001 using SPI and to the TMP102 using I2C.  The system was debugged using Saleae Logic 8 Analyzer.

The microcontroller code was ported from the Adafruit Bluefruit project which was authored by Kevin Townsend and running on an Arduino Uno.  KT did a great job.  Porting the code from the Arduino to the Silabs 8051 was a nightmare but I made it work.  Hey!  I am an analog guy mostly, so give me a break!

I am using UART Services for this project, so I was able to test the interface using Nordic’s NRF UART app on the Android.  Later, I had my son take the Nordic code and modify it to interface with the temp sensor.

The C8051F931 is implemented here on one of the Silabs Toolstick target boards.  Power can be provided external to the board or use an on-board LR44 battery that is boosted up using a SMPS boost converter built into the F931.  To make things simple for this demo, I used a separate 2032 coin cell to power the radio and the temp sensor.